

How To Install Freenas From Usb
FreeNAS offers a stable platform for home and part use. From a simple file server to a connected media hub, it's possible to configure FreeNAS to perform a multifariousness of tasks on behalf of other PCs on the same network. Thankfully, to install the Bone, it doesn't require much time or cognition.
What is FreeNAS and why should you employ it?
What y'all demand to get up and running with FreeNAS

Earlier y'all brainstorm, you lot need to ensure that you have everything you need. This includes the post-obit:
- A device that meets minimum requirements (run across the link above).
- 8GB USB drive (for Os).
- 1GB USB drive or DVD (for Os install).
- FreeNAS .iso file.
In order to install FreeNAS on a costless PC, you need to make certain the USB drive is bootable and has all the necessary files. Because disks are fading out in favor of removable media, here's how you can get a USB drive ready to go:
- Download FreeNAS.
- Insert your USB drive.
- Download Rufus (a program to create bootable USB drives).
-
Run Rufus, and select the USB.
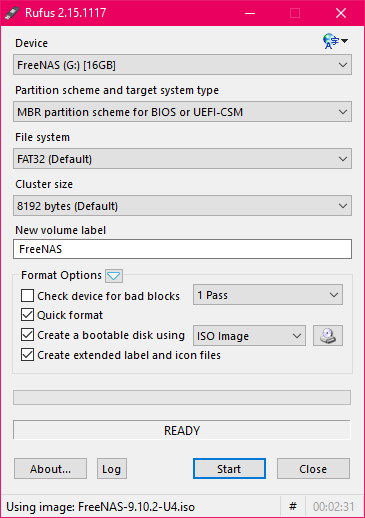
- Click the deejay image next to Create a bootable disk using.
- Navigate to the downloaded FreeNAS .iso file.
- Select the .iso file.
- Click Start.

The USB drive is at present set up to be inserted into the FreeNAS PC to install the OS.
Installing FreeNAS Os

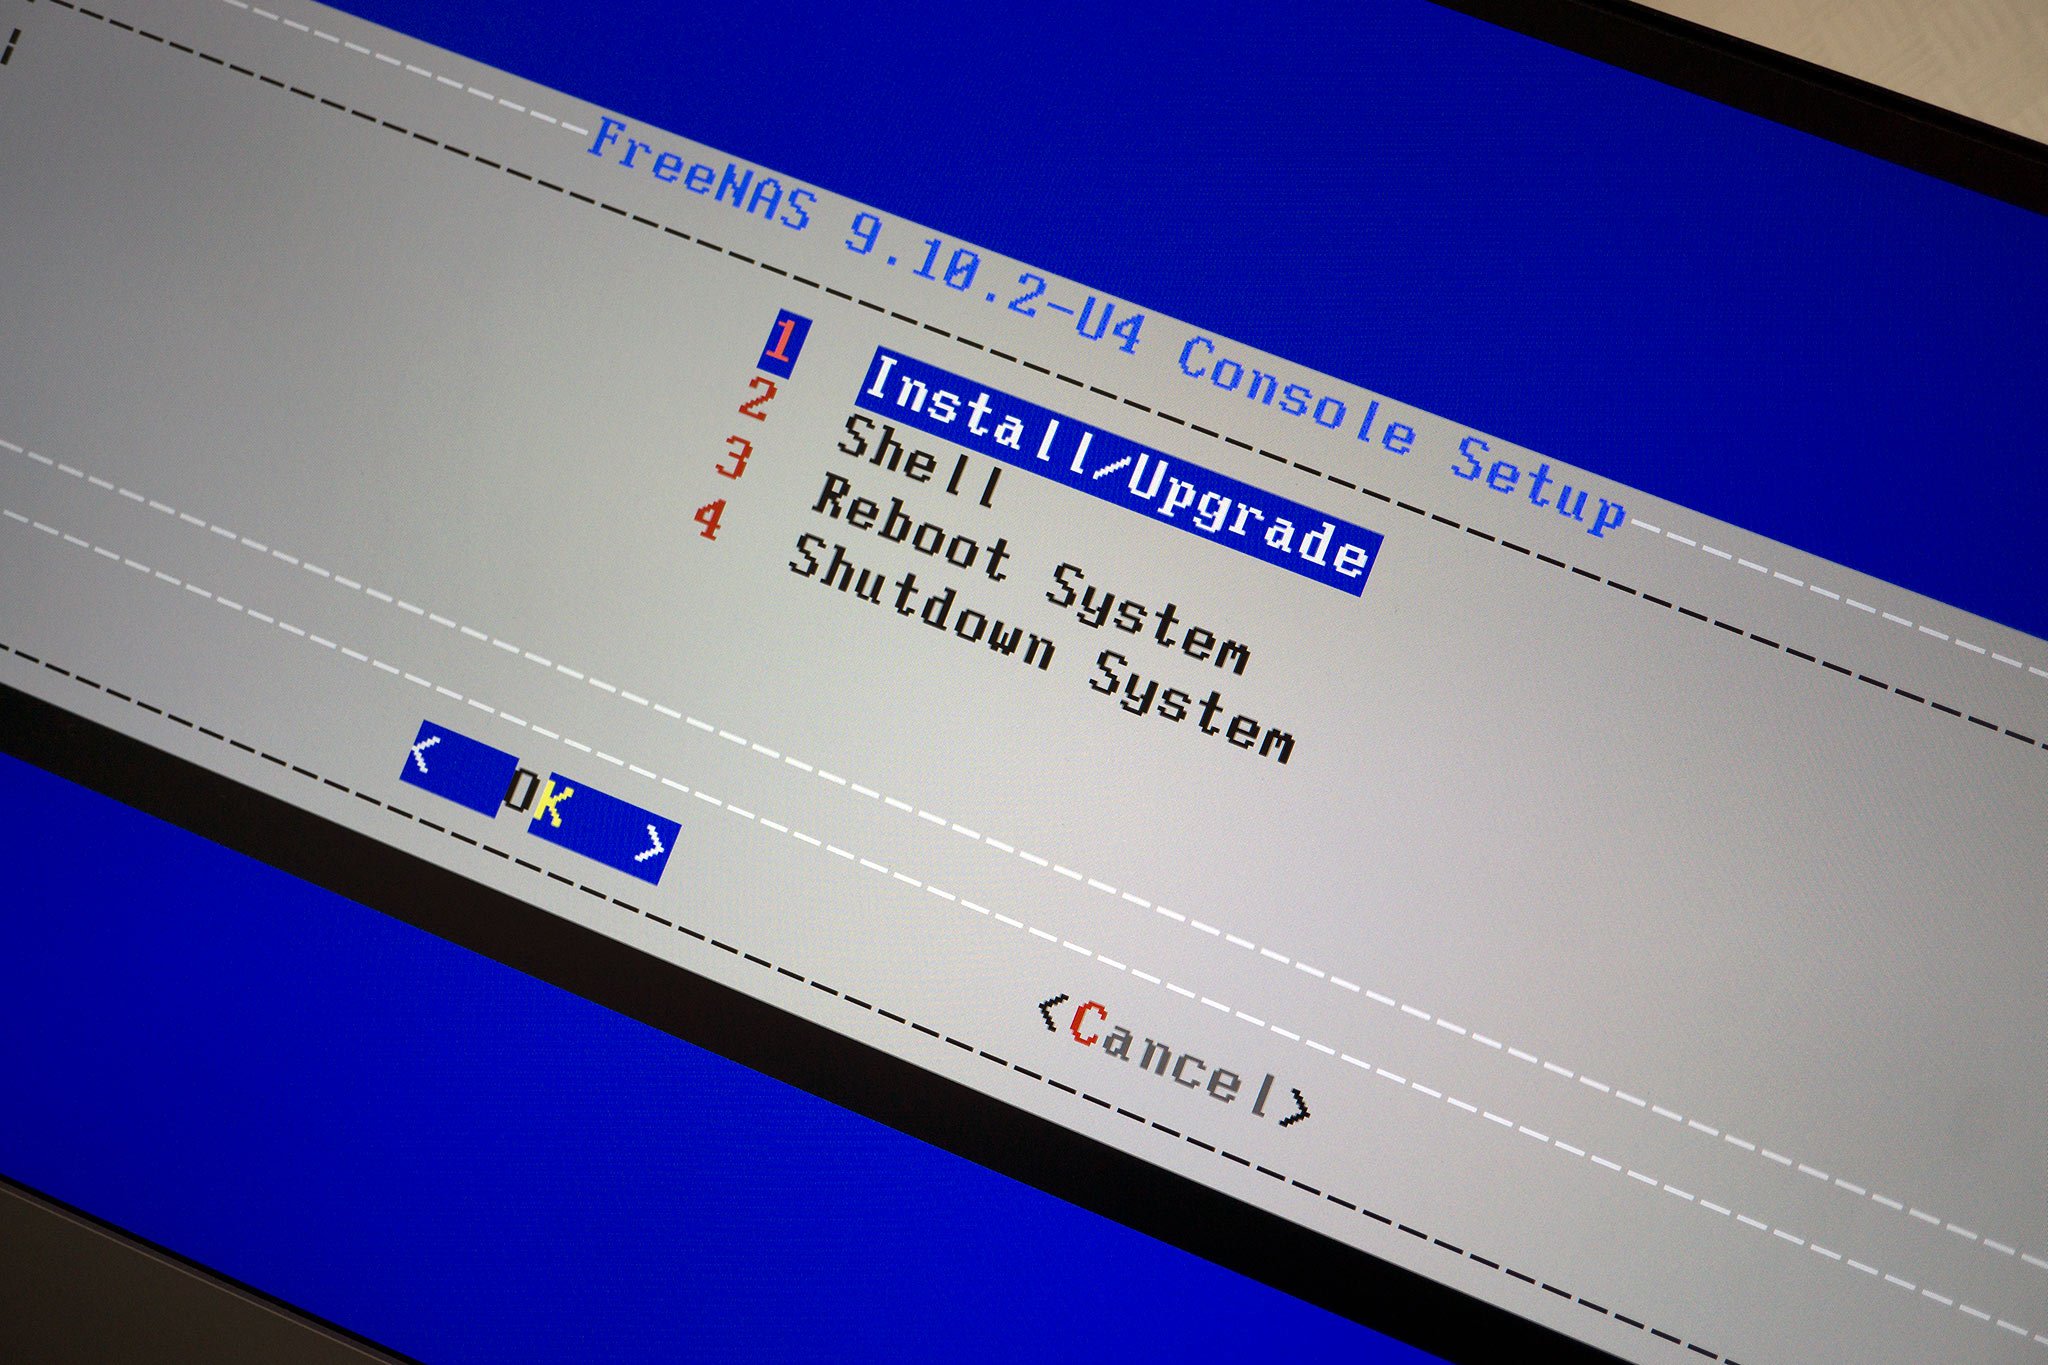
When firing up your FreeNAS PC, you should see a boot screen that displays FreeNAS as an option. You'll want to select this to go along. If cypher appears, you may need to hitting the boot menu shortcut for your motherboard (ours is F11) during startup or make sure the USB drive has been successfully gear up upward. Then do the following:
- Select Install/Upgrade.
- Select the spare USB drive (FreeNAS volition not install on the i containing the OS so fear not if y'all select the wrong one) with the spacebar.
- Hit Ok.
- Enter a root password.
- Hit Ok.
- Expect for the Bone to install.
- Reboot the PC.
In one case FreeNAS has loaded, information technology's possible to select from various entries on the principal carte, or detach the PC from a monitor and log in to the web interface from some other PC on the same network. The FreeNAS machine should provide a URL, which is essentially the IP that has been assigned to that particular auto by the network. For example, nosotros admission our FreeNAS test auto using 192.168.0.xiii in the spider web browser.
Initial FreeNAS setup

After successfully connecting to the car from another PC, the web interface will walk y'all through configuring various settings, including language, keyboard layout, and more. It's possible to get out this wizard and exercise everything manually. We'll run through the Wizard in our setup process to keep everything uncomplicated.
-
Enter a pool proper noun (can be unique or simply "storage").
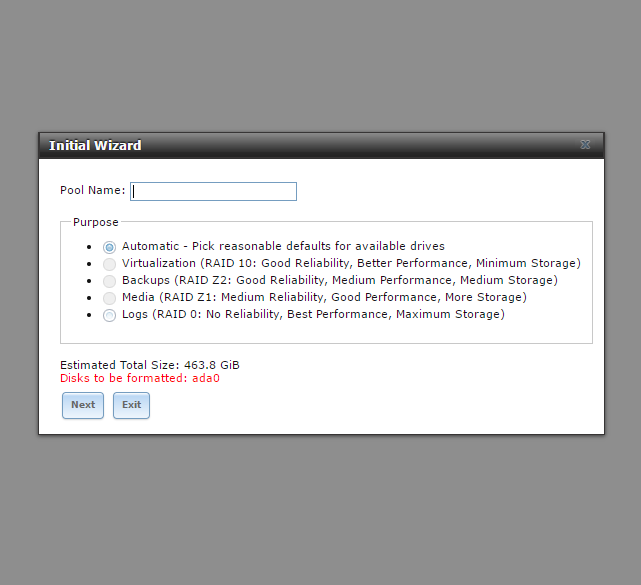
- Click Adjacent.
- Choose RAID setup (tin can be left on "automatic").
- Click Next.
- Select desired Directory Service (can be left on Active).
- Click Adjacent.
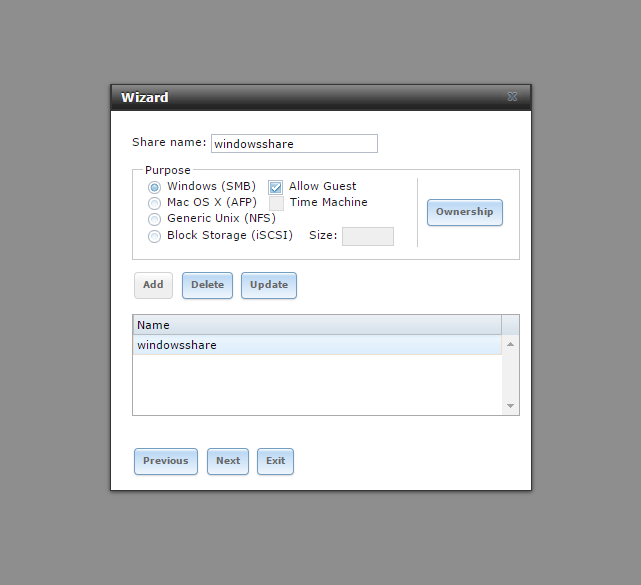
- Enter share proper name.
- Select Windows (SMB).
-
Striking Ownership.
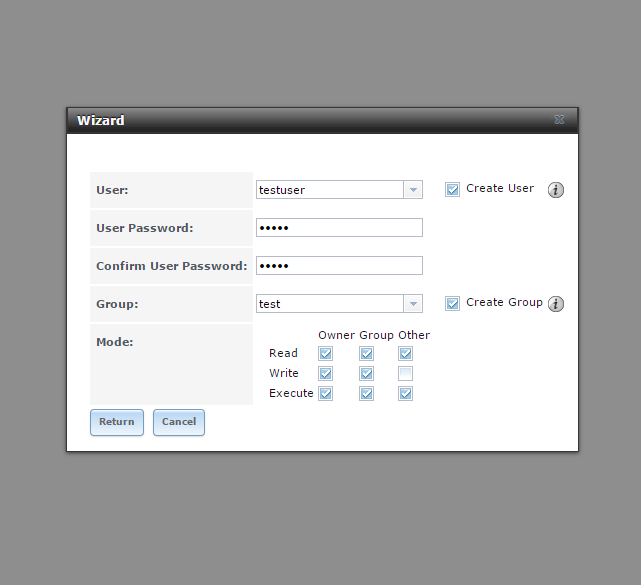
- Enter a username and select Create User.
- Enter a password.
- Create a new group and select Create Group.
- Alter permission boxes to reflect what we have.
- Hitting Return.
- Hit Add.
-
Click Ostend.
- Click Adjacent.
- Only configure this window if you lot wish to set up email on the server.
- Click Side by side.


The spider web interface will now run through the configuration and utilize all changes you lot made. This may take some time.
Setting up volumes

Here'south how to set upward a new book:
- Go to Storage > Volumes > Book Manager.
- Enter a name for the book.
- Add an available disk.
- Configure the volume layout.
- Click Add book.
Now you'll need to configure services for sharing and access.
- Click on Services at the peak.
- Enable SMB.

That's information technology. This is a bones setup using FreeNAS that volition now permit for connections to be made via Os file viewer programs (Explorer on Windows and Finder on macOS, for example). Simply connect through the corresponding GUI options or directly by using the same IP address that is used for the web interface. A credentials window will pop up asking for login information. Enter the aforementioned user account and password you created back in the magician.
Mapping Windows
In Windows, you can map the FreeNAS location to a specific drive letter of the alphabet so it appears in Windows Explorer as an internal hard drive. Here's how:
- Open up Explorer.
- Right-click on This PC.
- Click on Map network drive....
-
Cull a drive letter of the alphabet.
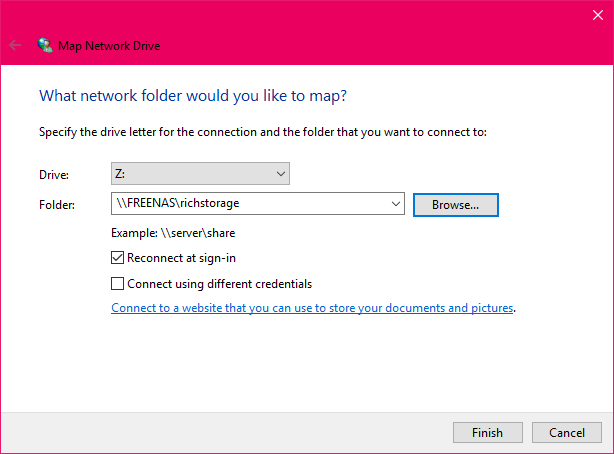
- Striking Browse.
- Scan to the network location.
- Click Ok.
- Click Finish.

Now a virtual drive will announced in Explorer, allowing for more convenient access.
Your plow to play around
At present's the time to play around with FreeNAS, exploring dissimilar aspects of the OS through the web admin interface. You can actuate various services that you may desire to employ, remembering that this is quite the capable platform that can be deployed as a media center with full support for popular media services, such as Plex. The best part about learning through trial and error is that information technology doesn't take long to reinstall the OS if you happen to really mess everything upwardly.
Got FreeNAS up and running? Allow us know in the comments what you're using information technology for.
Updated August 15, 2022: Nosotros updated this guide to include the latest info on installing FreeNAS.

TABS
Microsoft looks to be bringing tabs to File Explorer on Windows 11
It'due south finally happening! Microsoft appears to exist adding a tabbed interface to the top of File Explorer, every bit Insiders testing the latest preview build have discovered the characteristic in a hidden state. In one case enabled, tabs will announced along the top of the File Explorer app window, assuasive users to take multiple folders open in 1 window.

Appraise me
Messages in Elden Ring offer aid and sense of humour
Elden Ring's messaging system is an extension of a staple Night Souls feature that lets players send asynchronous notes across to other game worlds. Despite the limited vocabulary, players are able to offering help, humor, and hilarity, offering strangely poignant insights into the human listen.

Source: https://www.windowscentral.com/how-to-set-up-freenas-home-file-server
Posted by: lindseywisideeple.blogspot.com
0 Response to "How To Install Freenas From Usb"
Post a Comment